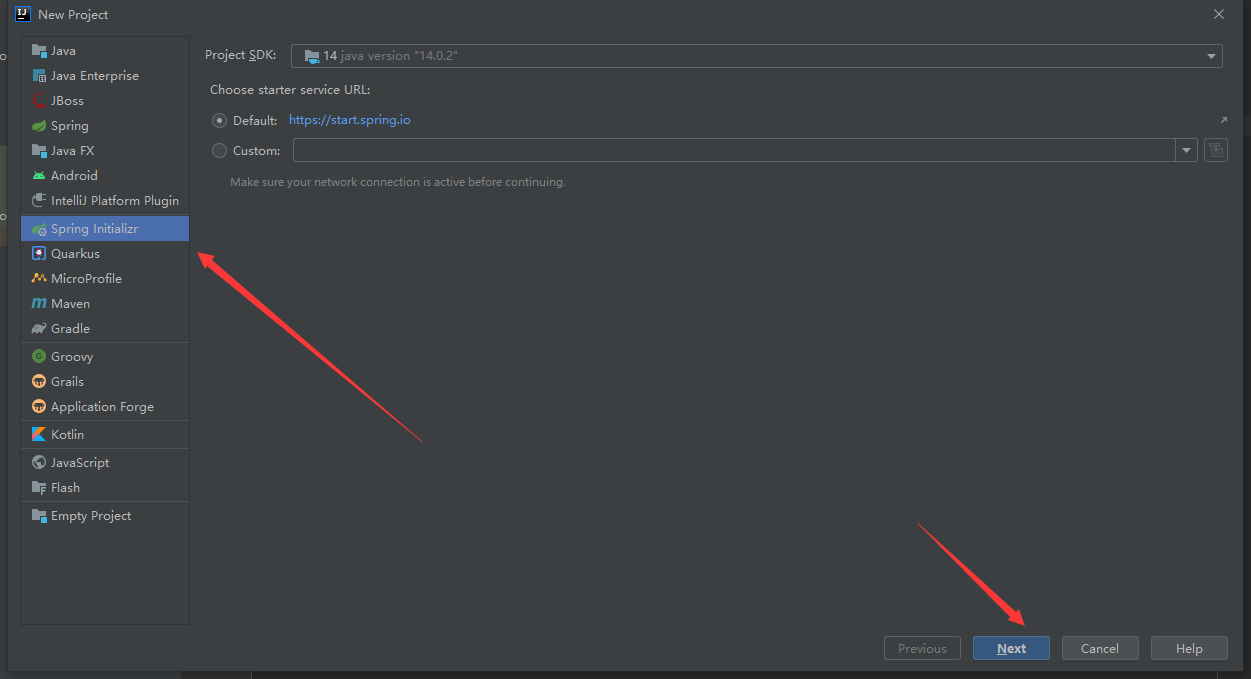
第一个SpringBoot程序
jdk1.8
maven 3.6.1
springboot 最新版
idea
原理初探
pom.xml
spring-boot-dependencies:核心依赖在父工程中
我们在写或者引入一些springboot依赖的时候,不需要指定版本,因为有版本仓库
启动器
<!--        启动器-->
        <dependency>
            <groupId>org.springframework.boot</groupId>
            <artifactId>spring-boot-starter</artifactId>
        </dependency>
启动器,说白了就是Springboot的启动场景
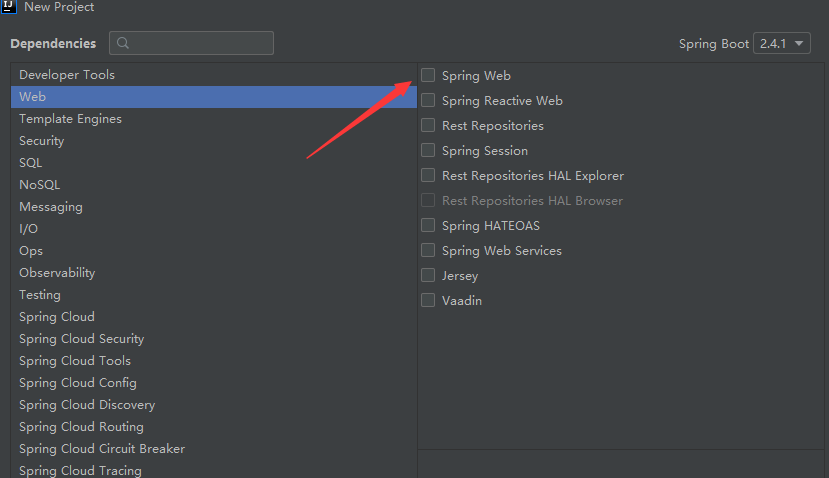
比如spring-boot-starter-web,他就会帮我们自动导入web环境所有的依赖
springboot会将所有的功能场景,都变成一个个启动器
我们要使用什么功能,就只需要找到对应的启动器就可以了。
主程序:不仅运行main方法,还启动了一个服务
/**
 * @author 风亦未止
 */
//@SpringBootApplication:标注这个类是一个Springboot的应用
@SpringBootApplication
public class SpringBootStudyApplication {

    public static void main(String[] args) {
        //将springboot应用启动
        //springApplication类
        //run方法
        SpringApplication.run(SpringBootStudyApplication.class, args);
    }

}
注解
@SpringBootConfiguration:springboot的配置
@Configuration:spring配置类
@Component:说明这也是一个spring的组件
@EnableAutoConfiguration:自动配置
@AutoConfigurationPackage:自动配置包
@Import(AutoconfigurationPackages.Registrar.class):自动配置“包注册”
@Import(AutoConfigurationImportSelector.class):自动配置导入选择
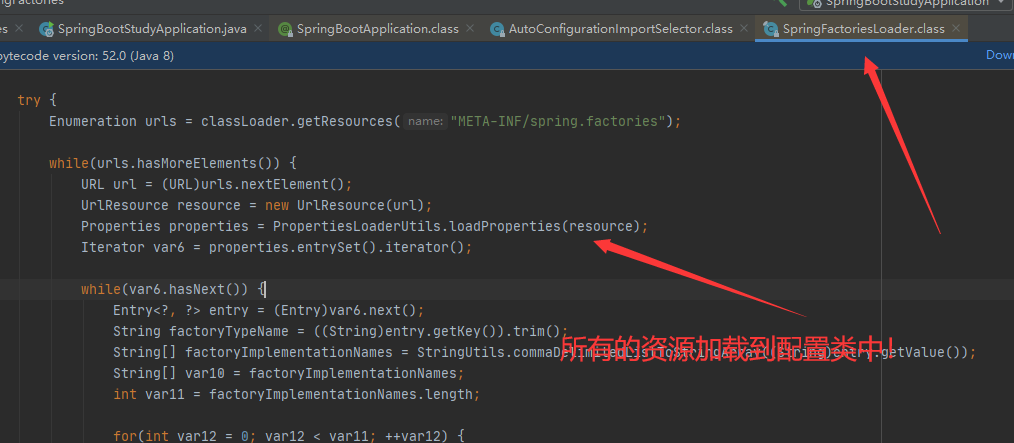
获取所有的配置
List<String> configurations = SpringFactoriesLoader.loadFactoryNames(this.getSpringFactoriesLoaderFactoryClass(), this.getBeanClassLoader());
获取候选的配置
 protected AnnotationAttributes getAttributes(AnnotationMetadata metadata) {
        String name = this.getAnnotationClass().getName();
        AnnotationAttributes attributes = AnnotationAttributes.fromMap(metadata.getAnnotationAttributes(name, true));
        Assert.notNull(attributes, () -> {
            return "No auto-configuration attributes found. Is " + metadata.getClassName() + " annotated with " + ClassUtils.getShortName(name) + "?";
        });
        return attributes;
    }
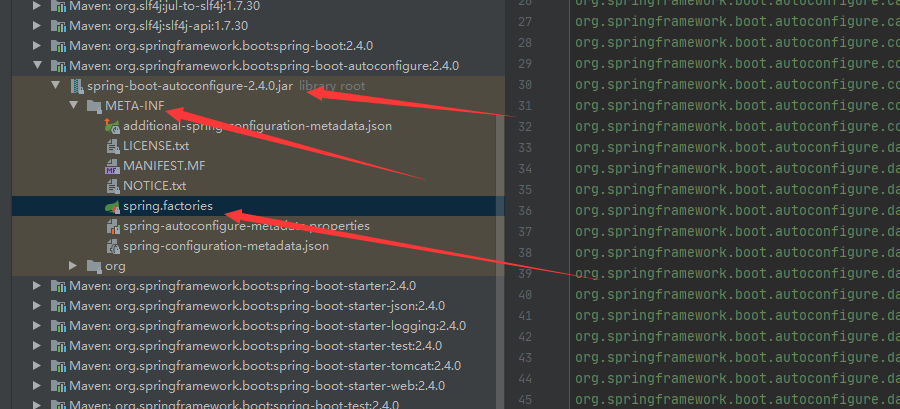
META-INF/spring.factories:自动配置类的核心
结论:
springboot所有自动配置都是在启动的时候扫描并加载: spring factories所有的自动配置类都在这里面,但是不定生效,要判断条件是否成立,只要导入了对应的start,就有对应的启动器了,有了启动器,我们自动装配就会生效,然后就配置成功!
1. springboot在启动的时候,从类路径下/META-INF/spring. factories获取指定的值;
2.将这些自动配置的类导入容器,自动配置就会生效,帮我进行自动配置!
3.以前我们需要自动配置的东西,现在springboot帮我们做了!
4.整合javaEE,解决方案和自动配置的东西都在spring-boot-autoconfigure 2.2.0.RELEASE.jar这个包下
5.它会把所有需要导入的组件,以类名的方式返回,这些组件就会被添加到容器;
6.容器中也会存在非常多的xxxAutoConfiguration的文件(@Bean),就是这些类给容器中导入了这个场景需要的所有组件;并自动配置,@Configuration, JavaConfig!
7.有了自动配置类,免去了我们手动编写配置文件的工作!
SpringApplication.run的分析
分析该方法主要分为两个部分,一部分是SpringApplication的实例化,二是run方法的执行
SpringApplication
这个类主要做了以下四件事件
1.推断应用的类型是普通的项目还是web项目
2.查找并加载所有可用初始化器,设置到initializers属性中
3.找出所有的应用程序监听器,设置到listeners属性中
4.推断并设置main方法的定义类,找到并运行的主类
看看它的构造器
 public SpringApplication(ResourceLoader resourceLoader, Class<?>... primarySources) {
        this.sources = new LinkedHashSet();
        this.bannerMode = Mode.CONSOLE;
        this.logStartupInfo = true;
        this.addCommandLineProperties = true;
        this.addConversionService = true;
        this.headless = true;
        this.registerShutdownHook = true;
        this.additionalProfiles = Collections.emptySet();
        this.isCustomEnvironment = false;
        this.lazyInitialization = false;
        this.applicationContextFactory = ApplicationContextFactory.DEFAULT;
        this.applicationStartup = ApplicationStartup.DEFAULT;
        this.resourceLoader = resourceLoader;
        Assert.notNull(primarySources, "PrimarySources must not be null");
        this.primarySources = new LinkedHashSet(Arrays.asList(primarySources));
        this.webApplicationType = WebApplicationType.deduceFromClasspath();
        this.bootstrappers = new ArrayList(this.getSpringFactoriesInstances(Bootstrapper.class));
        this.setInitializers(this.getSpringFactoriesInstances(ApplicationContextInitializer.class));
        this.setListeners(this.getSpringFactoriesInstances(ApplicationListener.class));
        this.mainApplicationClass = this.deduceMainApplicationClass();
    }
javaConfig:@Configuraion @Bean
Docker:进程
全面接管SpringMVC的配置!实操!
yaml语法
kry:空格value
如:
serve:
 post: 8080

#对象
student:
 name: zzk
 age:20

#行内写法
student: {name: zzk,age:20}
#数组
pets:
  - cat
  - dog
  - pig
pets: [cat,dog,pig]
对空格的要求十分高
可以注入到对象类中
yaml可以给实体类赋值
解决爆红的依赖:
xml
<dependency>
    <groupId>org.springframework.boot</groupId>
    <artifactId>spring-boot-configuration-processor</artifactId>
</dependency>
yaml注入
@SpringBootTest
class SpringBootStudyApplicationTests {
    @Autowired
     Person person;
    @Autowired
    private Pet pet;

    @Test
    void contextLoads() {
        System.out.println(person);
    }

}
@Component
@ConfigurationProperties(prefix = "person")
public class Person {
    private String name;
    private int age;
    private String sex;
jsr303校验
松散绑定:比如我的yaml中写的last-name,这个和类中的lastName是一样的,-后面跟着的字母默认是大写的,这就是松散绑定
需要配置依赖:
 <dependency>
            <groupId>org.springframework.boot</groupId>
            <artifactId>spring-boot-starter-validation</artifactId>
        </dependency>
jsr303校验的功能是规定一个变量的值为固定格式:
@Validated//数据校验
public class Person {
    @Email(message = "邮箱格式错误")
    private String name;
    private int age;
    private String sex;
default message [邮箱格式错误]
校验的注解有很多,可以网上查;
多环境配置及配置文件位置
配置文件可以处在以下位置,且有由上到下的优先级
-
The classpath root;类路径下的根目录
-
The classpath
/configpackage -
The current directory
-
The
/configsubdirectory in the current directory -
Immediate child directories of the
/configsubdirectory
以下三个环境写在一个文件里了:
server:
  port: 8081

#要激活的环境块
spring:
  profiles:
    active: dev
---
server:
  port: 8082
#额外的配置名称
spring:
  profiles: dev
---
server:
  port: 8083

spring:
  profiles: test
标签: 开发日记


